Recommended WordPress Plugins for New Sites
We have been asked a number of times to provide a list of plugins that every beginner blogger and new site owner should have on WordPress. The main reason we haven’t done this so far is because it’s hard to pin down a perfect list of plugins that every site should have.
The main reason for this is each person and site is different. What one person might want, another might not.
Having said that, we wanted to put together a list of plugins that we do think every site should have, no matter what they provide.
We are going to list a few plugins here, along with how to set them up so you can be sure you will be ready to get your site running right from the beginning.
There is one thing I want you to remember about plugins. Too many have a common misconception about some arbitrary number that you need to stay below. We don’t follow that philosophy.
It’s not the number of plugins that affect your speed, it’s what they do. Focus on quality over quantity!
There are a few categories we are going to cover here around the plugins we suggest. These categories include:
There are probably more someone can cover, but this is pretty good to start. So, now we get ready to install some plugins!
The Plugin We Install on Every Site
There is one plugin we install on every site and that is simply Yoast SEO. This plugin is probably the most used plugin on WordPress by a wide margin. There are other SEO plugins, but Yoast is what we use and recommend. It’s not perfect, but it makes understanding SEO a bit more.
Please note that installing Yoast does not mean you are going to get traffic from search engines. This plugin is just a guide. Green lights have very little meaning and should not be a focus. Use Yoast to just provide you with better markup, meta tags, etc. Don’t kill yourself to get green lights.
To install Yoast, just go to Plugins > Add New and then search for Yoast in the box. You can install and activate it from there.
There really isn’t any setup needed for Yoast. It works out of the box on most sites. You do NOT need to connect it to your Google Search Console. I, in fact, don’t recommend it as it’s just an unnecessary thing that can slow down your admin dashboard.
Backups
If you have taken our free WordPress course, then you know we stress the importance of backups. You should always have backups of your site that you can control.
NEVER rely on hosting backups for any reason. No matter the host.
Why do we say this? Simply put…
We have been working on sites for a long time and have seen issues with more hosting backups that we care to admit. It’s the ones who have their own backups that tend to have better luck when something bad happens.
The backup plugin we recommend installing is UpdraftPlus. They have a free version and a paid one. The free version is sufficient.
To make this plugin work, you should always connect it to a Dropbox, Google Drive, or Amazon S3 (if you know how to set it up) account.
Having offsite backups is incredibly important.
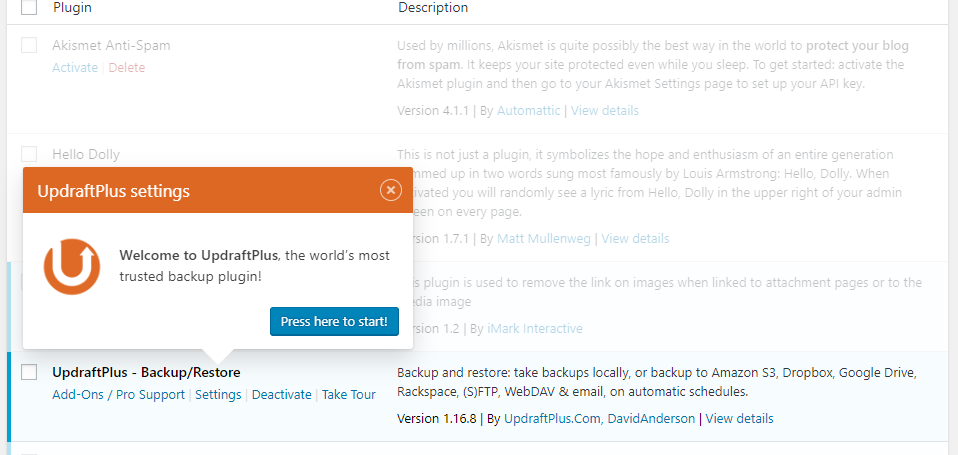
To setup UpdraftPlus, go to Plugins > Add New, then search for UpdraftPlus. Install and activate from there. It will then pop up something to get started. Press the button.
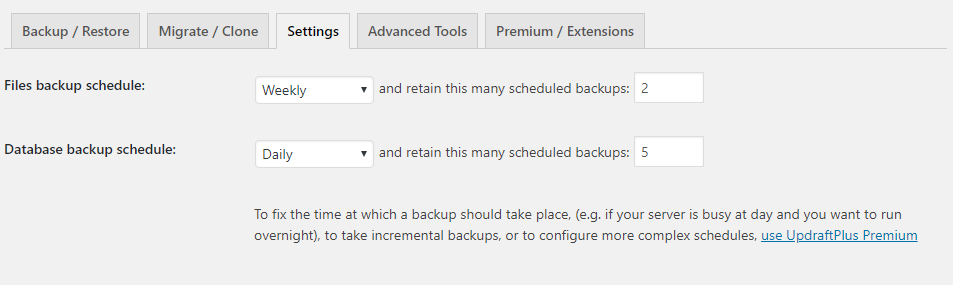
Click on the Setting tab and in there, set your files to backup weekly and save 2 versions. Set your database to backup daily and set it to hold 5 versions. This will give you a week of database backups. They are smaller, so you can hold more.
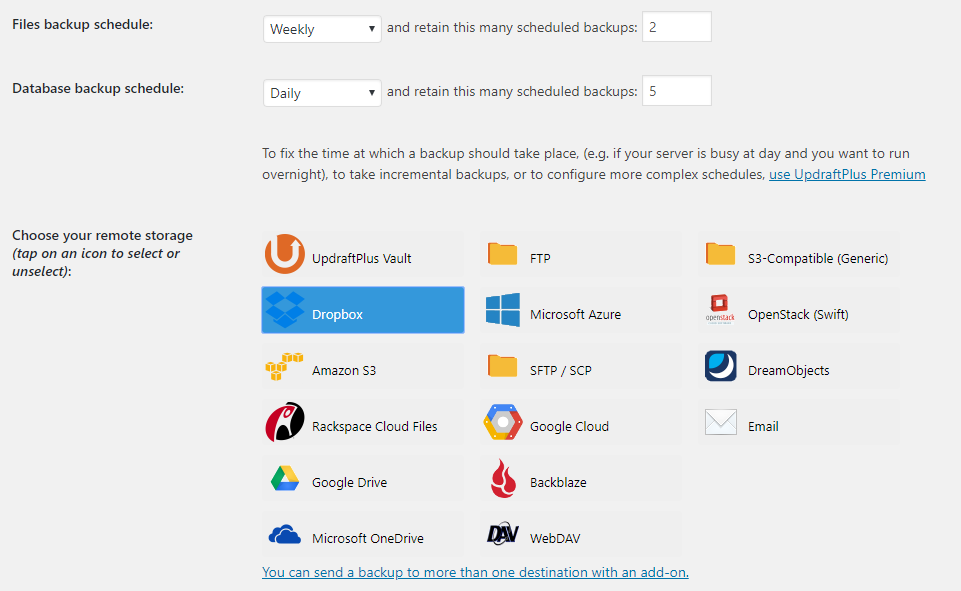
You then will select an offsite location to store you backups. We suggest Dropbox because it has a better integration and the backups will be removed from your server when they go to Dropbox. Google Drive works too, but it has some bugs with Google not notifying UpdraftPlus of a successful backup.
You then scroll all the way down and hit save changes. This will move you back up and put up a link to the location you want to authorize. Click the link and log into your account and follow the instructions. It’s very easy.
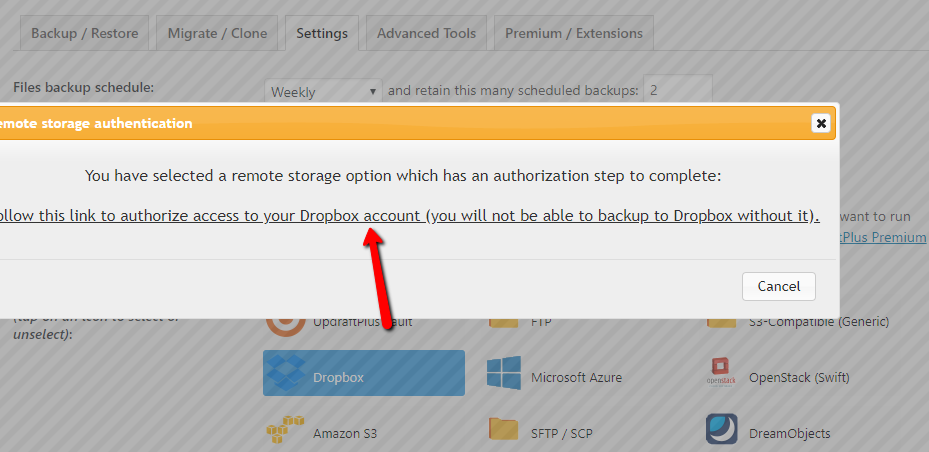
Once done, your backups will run!
If you want to get offsite backups, malware monitoring, and firewall protection, look into our new protect plans, which give you all that for a cheap monthly price.
Comment Spam
Let’s face it, comment spam is a real issue with WordPress. There are tons of automated bots out there pushing comment spam down our throats. Luckily, there are some really good plugins that help us control this.
The best one used to be Akismet, but this plugin is no longer free. You can download it, but their terms state if you plan on trying to make money from your site, you cannot use a free API key.
Who isn’t trying to make money from their site?
Here is one plugin we suggest checking out.
Antispam Bee
This plugin is easy to setup. You just have to install it by going to Plugins > Add New, then search for antispam bee and install/activate from there. The default settings will work for you just fine.
Contact Forms
We all need a way for people to contact us. We don’t advise just putting your email address right on a contact page. The reason is you open your email up to massive spam. There are bots that go on pages just looking for email addresses. This is why contact pages are great.
We used to recommend Contact Form 7. We no longer do that because of how it loads junk on all of your pages. For this reason, we have switched our forms and recommendation to this:
WPForms Lite
This is one of the best contact form plugins we have come across. We have the pro version for various reasons, but the lite version will be sufficient for most. It’s easy to use and create forms for your site.
To install WPForms lite, just go to Plugins > Add New, then search for “wpforms” and install/activate from there.
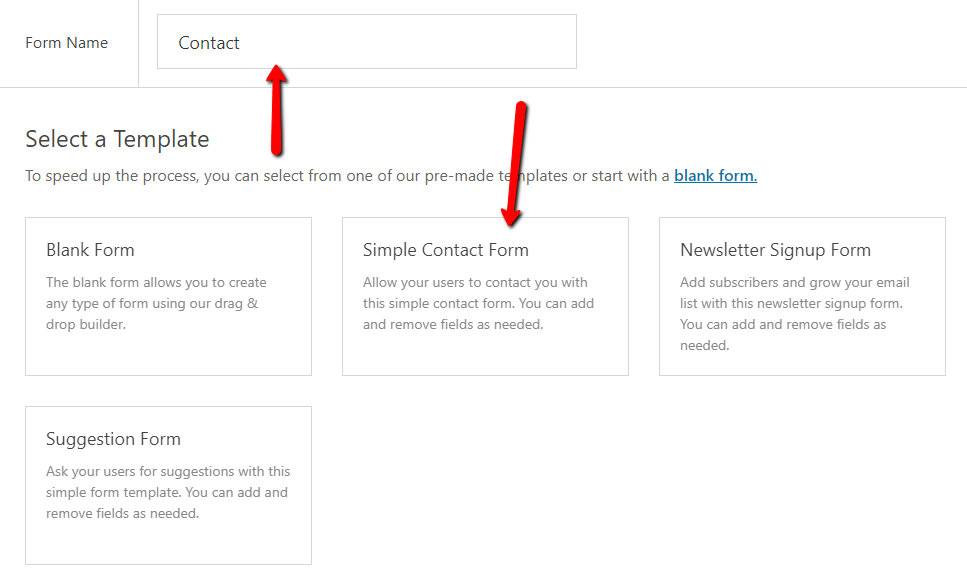
Once you activate the plugin, it will bring you to a page that says create your first form. Click that button to get started. You can even watch their Youtube video to get assistance.

You will name your form (anything you want) on the next page, then choose Simple Contact Form as the template.
I like to change the way the name appears from having two fields for first and last name to just one field for name. You do that by clicking on the field and then selecting simple as the format.
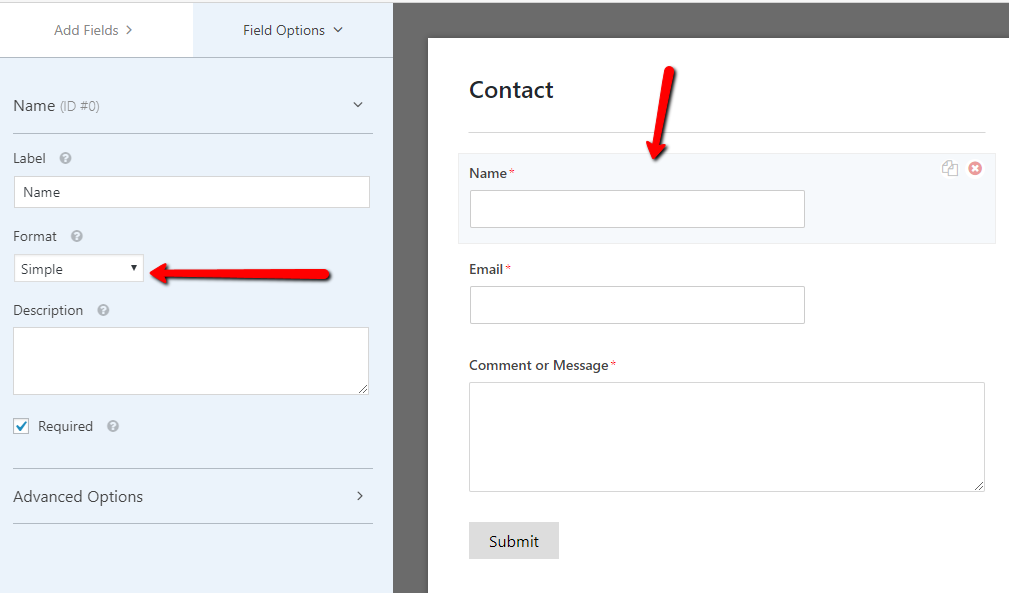
If you want to add more fields, you can do so on this page by clicking the add fields tab. For most, this current template will work just fine.
Next, click on Settings > Notifications and you can change where the form goes (to what email) and what info it has.

One tip here is the From Email has to be one that uses your domain, so something like [email protected] or something. It defaults to whatever you have set as your admin domain under Settings > General in the WordPress dashboard, but if you are using a Gmail account, this won’t work.
We have found you don’t even need to really have that domain email for it to work. You can just add one in that field.
We also like to change the Email Subject to something like this:
New Contact from {field_id=”0″}
This will pull in the person’s name they put in the contact form. This is helpful so each email subject will be different which is nice in Gmail so they don’t all bundle together.
After you make that change, you can then click Save Changes.
When you are editing your contact page or any page you have where you want the form to go, you can just click the insert forms button in the editor (if using Classic Editor) or use the WPForms Gutenberg Block to add it into the page.
Now, people can use the form to contact you.
Social Sharing
We write our content because we want people to read it, right? Well, if you want visitors, you need people to share your content with others. The easiest way to allow for this is to provide people with a way to do so.
Social sharing plugins allow for readers to share your posts and pages with others on networks like Facebook, Twitter, Pinterest, and more.
You should always give people an easy way to share your content. We suggest using one of the following plugins.
Grow by Mediavine

This is what we provide in our monthly support plans for customers. There is a free and a paid version. The difference is the ability to specify what custom Pinterest/Social image and description you want shared when people click the buttons. This is a great way to control your branding experience on social media.
It’s not necessary to use the paid version when you are starting out. The free version works just fine!
To start, you can install by going to Plugins > Add New, then search for Grow by Mediavine. Install and activate.
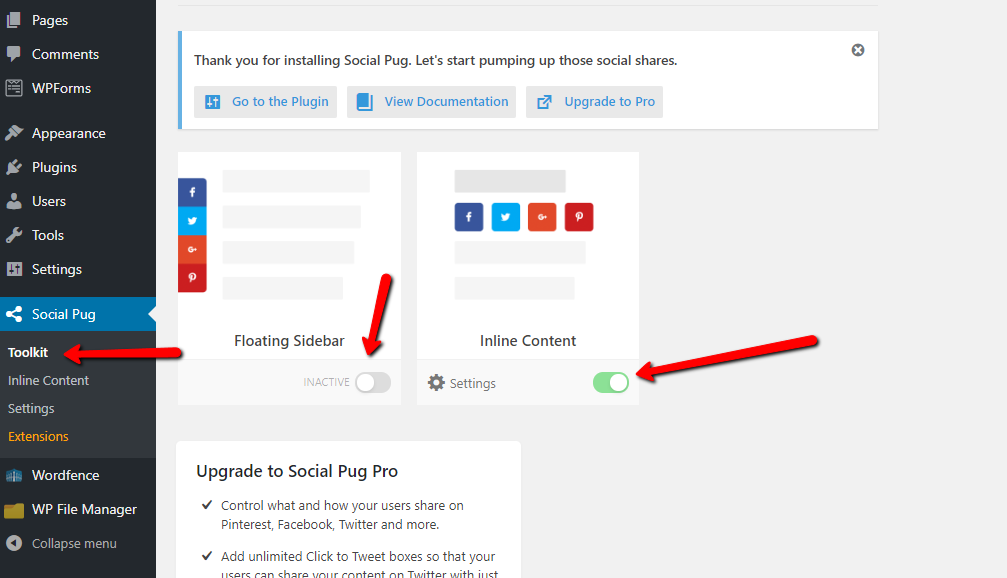
You will find the settings for Grow under the menu item in your dashboard.
We don’t typically recommend using the floating sidebar unless you want it.
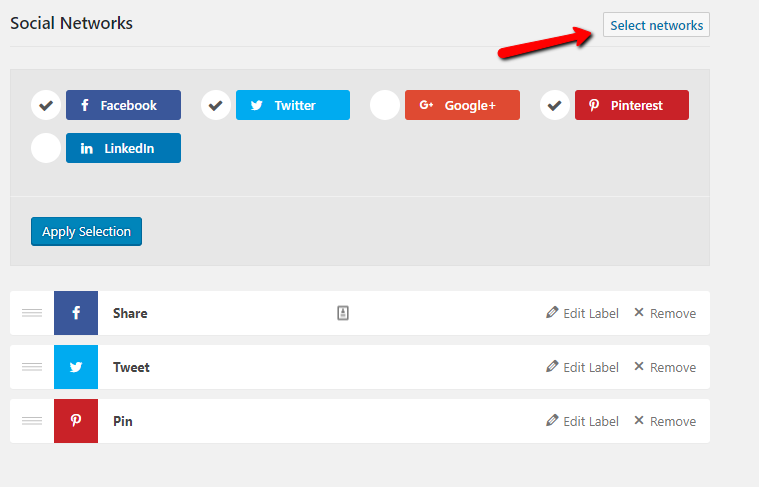
For the number of columns, we typically choose the number of buttons we have showing. If only three networks, then we choose three columns.
Most likely, you do not need to have the Share text so you can remove that.

When done, just hit Save Changes.
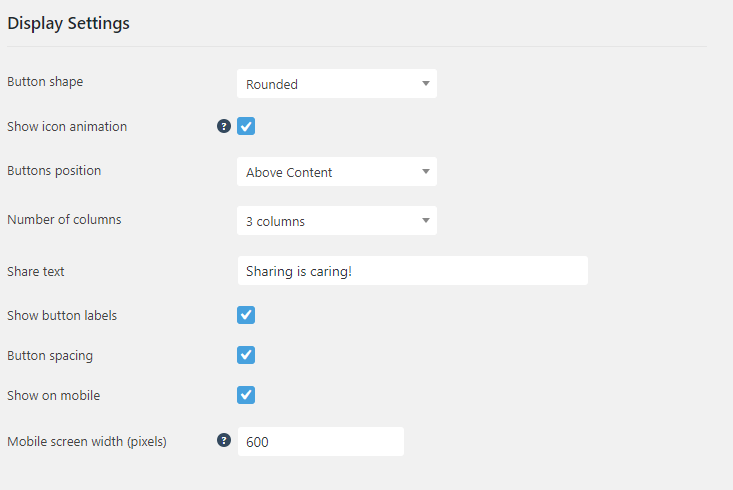
Scriptless Social Sharing
This is by far the fastest loading social sharing plugin we have come across. This provides a few features (even allowing a custom Pinterest image), but keeps the list small. They don’t even provide social sharing counts. The reason for this is those share counts slow down the load time of your site. It’s just a fact!
To install this, just go to Plugins > Add New, then search for Sciptless Social Sharing. Install and activate.
You will find the settings under Settings > Scriptless Social Sharing
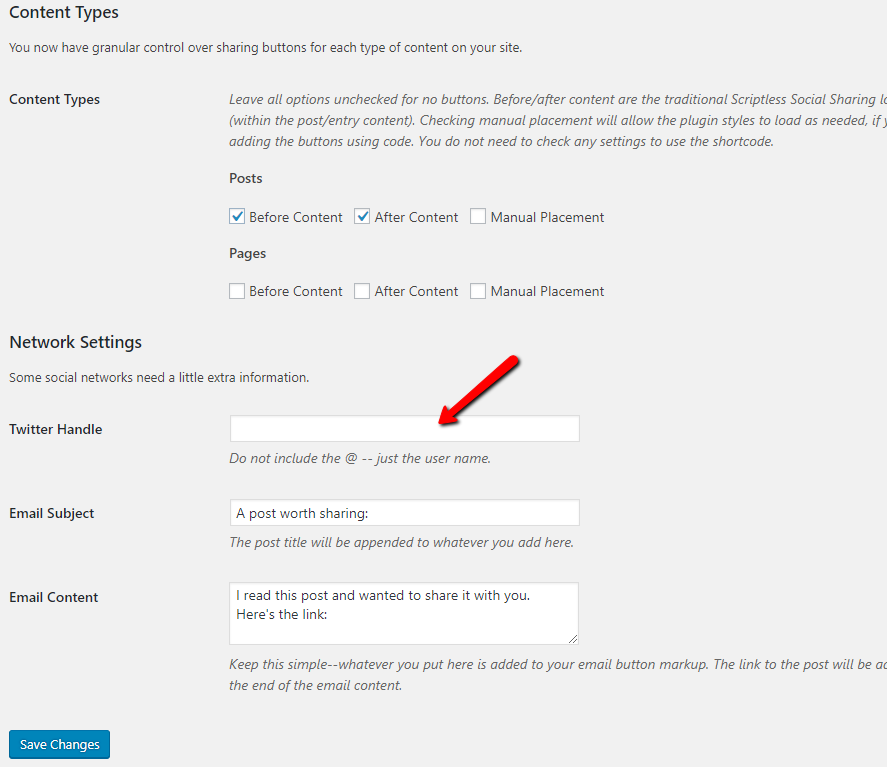
You can choose what buttons you want and also order them differently. They still have Google+ in the list, but this network is no longer around. You don’t need the heading text unless you want it.
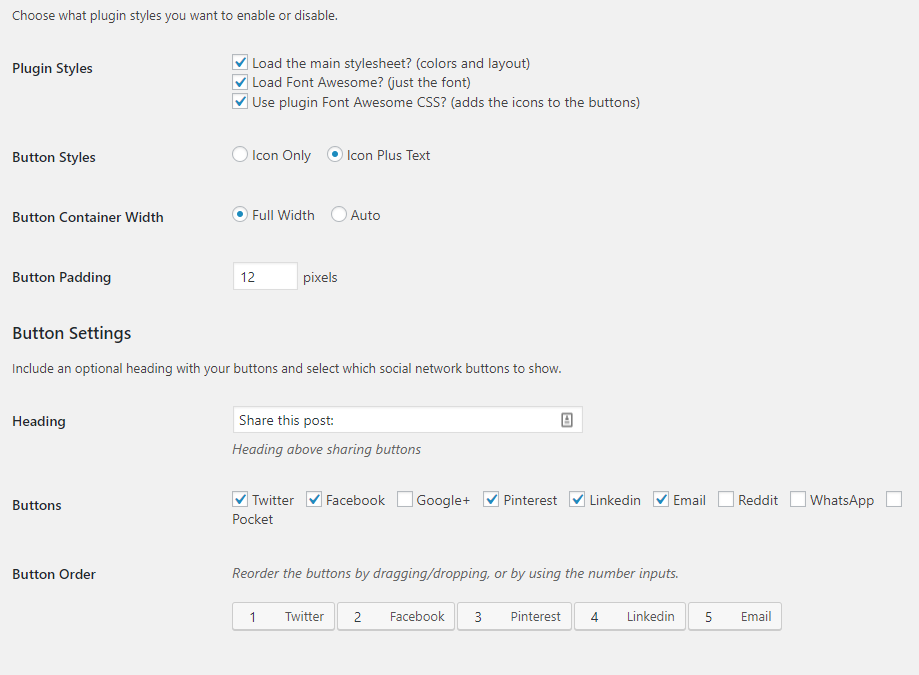
You can put the buttons before or after content on your posts. You can also do this on posts. You have the ability to select both before and after as well.
Then you enter your Twitter handle and hit Save Changes.
Security
There is a difference between spam and malware. The plugins we mentioned above deal with spam and what we are going to suggest here deals with malware and hackers.
I’ll be very upfront here. WordPress is a great platform, but since it’s the most popular CMS in the world, it is targeted by hackers.
The best way to make sure your site stays safe is have a strong username (not “admin”), strong password, and keep your site up to date with regards to plugins, themes, and the WordPress core.
Don’t want to keep up with updates? Let us do it for you! Check out our monthly WordPress support plans.
We like and use WordFence for most sites. This is probably the most popular security plugin on WordPress. It does great work and the free version is adequate for most hosts as well.
There are a lot of settings for this plugin, so we made it easy for you and created a code you can just import and the options will be setup. Done and done!
To install WordFence, go to Plugins > Add New and search for wordfence. Install and Activate from there. You will then be greeted with a few screens.
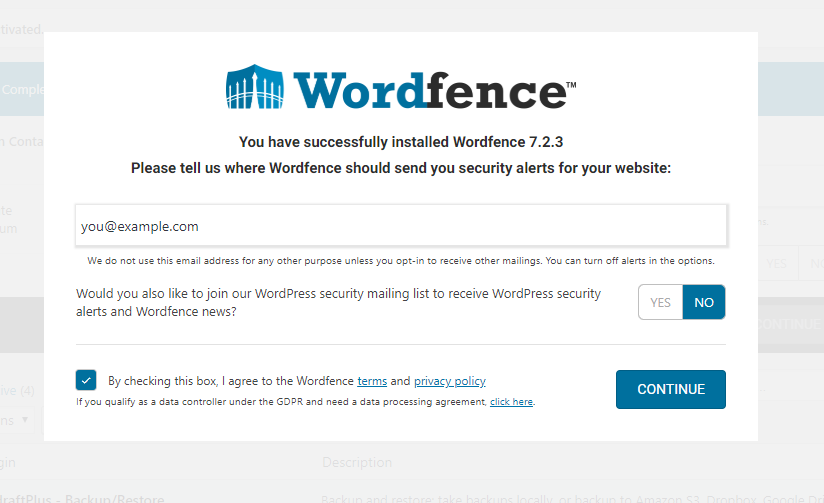
Put in your email address, click the no box, then check you agree to the terms (read them) and then the Continue button. The next page will ask you if you have a premium license. Just say no thanks.
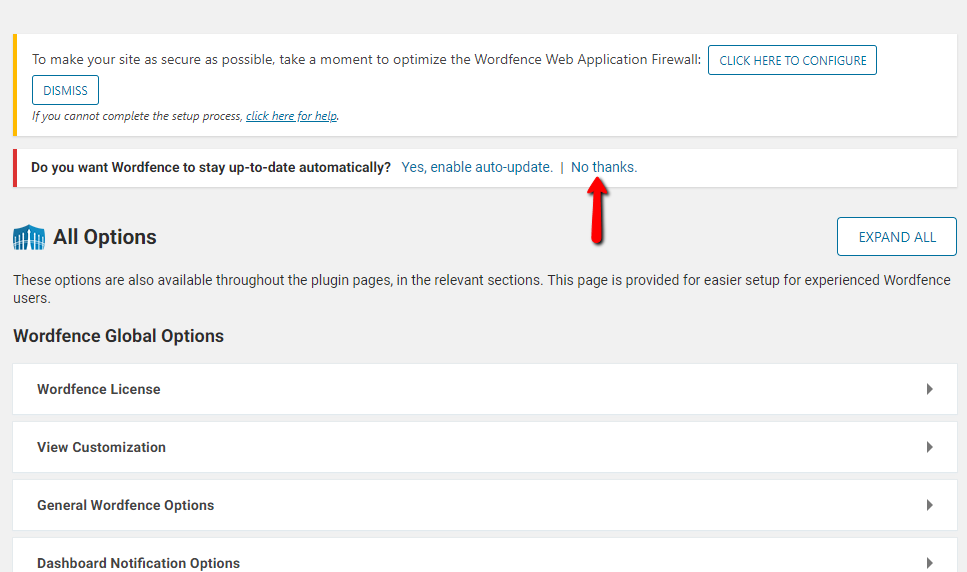
You will then see two notices at the top of your site. You can click No thanks for the auto update. Leave the other one for a few more steps.
Since we wanted to make this easy for you, we created an import code that will work on most sites. Go to WordFence > Tools > Import/Export and add this code in the Import box:
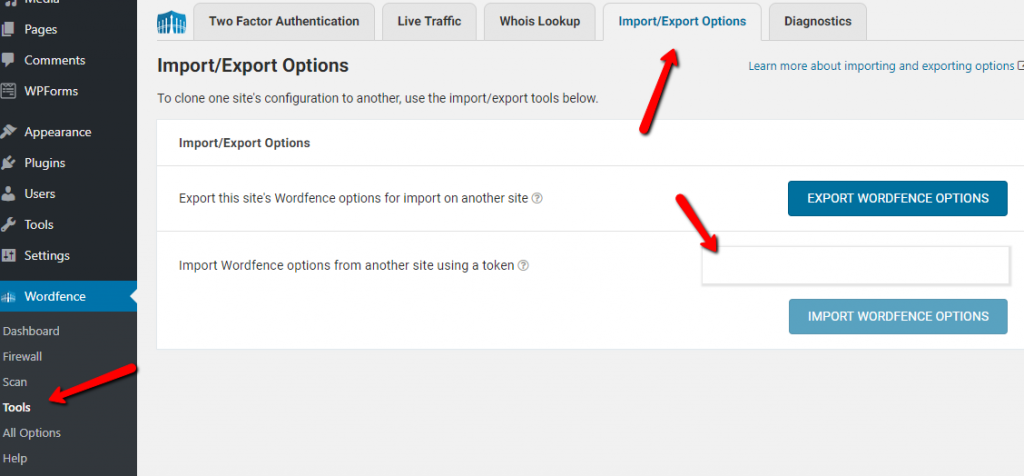
af284de64d8d4782fccb7d18492a8f8cee5b0c36a8525bfb634d33a3436fe5b76a4e57d63f2b535716edc8f71e95f93fa52f4ae6221075d656485c153322ab05Now just click Import WordFence Options.
This will overwrite the email address you added in the beginning, but just go to All Options under the WordFence menu and then open the General WordFence Options bar and put the email address back in and Save Changes.
For the other notice at the top of the page, you can click the “Click here to configure button”.
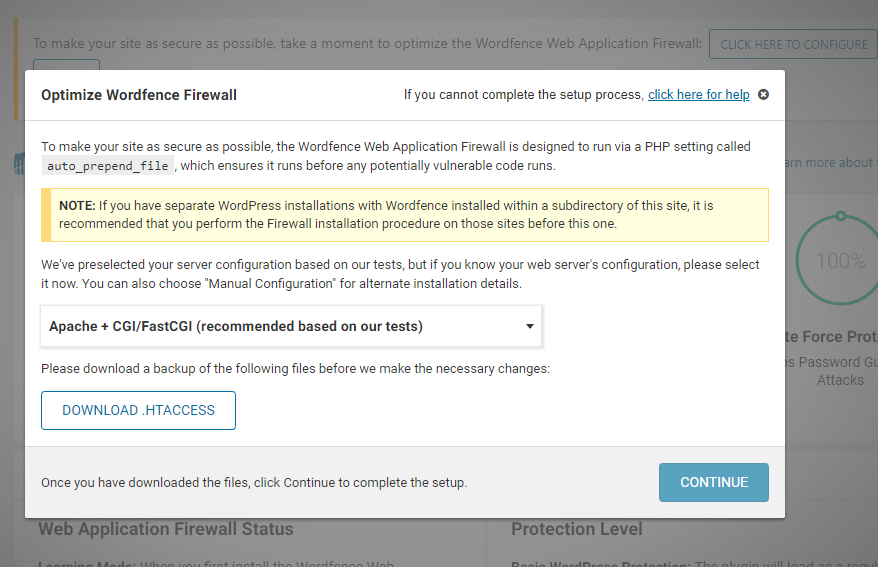
The options here depend on what server you have. It will try to select the right server and then tell you to download the .htaccess file. Do this and make sure you have the ability to restore it on your host before clicking continue.
If you’re not sure how to do this, please reach out to us and we can do this for a quick fix.
Hosts like SiteGround do require a manual setup, so please reach out to their support to help. They know how to do this.
Once you click continue, it should stay you are optimized or it will say it’s not ready yet and that is usually due to the server configuration (such as Litespeed).
Image Compression
One of the biggest mistakes beginners make (and still many who have been blogging for some time) is they upload full sized images right into WordPress.
Big images are one of the leading causes for slow site speed. When you upload an image from your phone or camera, you are loading something that is about 5x too large.
Imagine as you keep blogging and adding large photos. It just destroys your site speed. We recommend people try to get the image file size down to around 100kb or less.
For image dimensions, that depends entirely on your site, theme, and goals. You never need to upload an image that is 3000px wide from a camera. Just never!
Do NOT upload images from your camera or phone directly into WordPress. This is a no-no!
There is really only one plugin we recommend here and it’s a paid one. The reason we recommend it is because it’s the best and does the best job. There are several free ones for image compression like Smush and EWWW, but they don’t do a good job. They just do not!
We use and recommend ShortPixel. You can download it for free and you can get 100 image credits per month, but most people will need more than that. Here’s why.
Shortpixel uses image credits. It’s one credit per image that needs to be compressed. The thing about WordPress is that when you upload one image into the media library, another three (at least) are created. These are called thumbnails.
Most themes also create a few more thumbnails. We typically see around 8-10 thumbnails created per upload.
This means when you upload one image, it takes up 9-11 image credits. So, you only get about 10 image uploads per month with ShortPixel’s free plan.
If you’d like to use the power of ShortPixel and not pay for it, you still can!
The have a free compression tool on their site, which is found here. You can take the image you want to upload to WordPress and run it through the compression tool first and then upload into WordPress.
If you do it this way, you don’t need to install the ShortPixel plugin and you can avoid a fee.
To install ShortPixel, you will go to Plugins > Add New, then search for shortpixel. Install/activate from there.
It will come up with a page that asks for an API key. You can generate one right from this page.
It will then send you to the settings page. You will need to pick the compression type. You get the best compression rate (smaller file size) with Lossy. Most can use this.
If you have a lot of images with text on it, Glossy might be a better option. You can click the test link right next to the options to upload a photo and test each compression type to see which you like better.
Once you re done, you just click save changes. If you have a lot of image to compress, this is when you need to go to ShortPixel.com to pay for credits.
Website Caching
Most websites have some form of caching. Let’s describe what caching does so you can understand why it’s important.
Caching allows your browser to take a snapshot of a page so it can load quicker.
When you load a website, your browser has to pull all of the elements from the hosting server. When you first load a page, it will take a snapshot of those elements and as you move from page to page, it won’t have to pull those elements from the server again.
This makes your site faster and browsing faster. It also takes stress of your server.
WPRocket
WPRocket is our favorite caching plugin. This is not a free plugin, but one of the best there is. This is why we include it in our list. For those on our WordPress Support plans, you get access to this plugin included!
To install this plugin after you buy it, you will download the zip file from your WPRocket account. Then go to Plugins > Add New > Upload. Make sure you upload the zip folder. It has to be zipped.
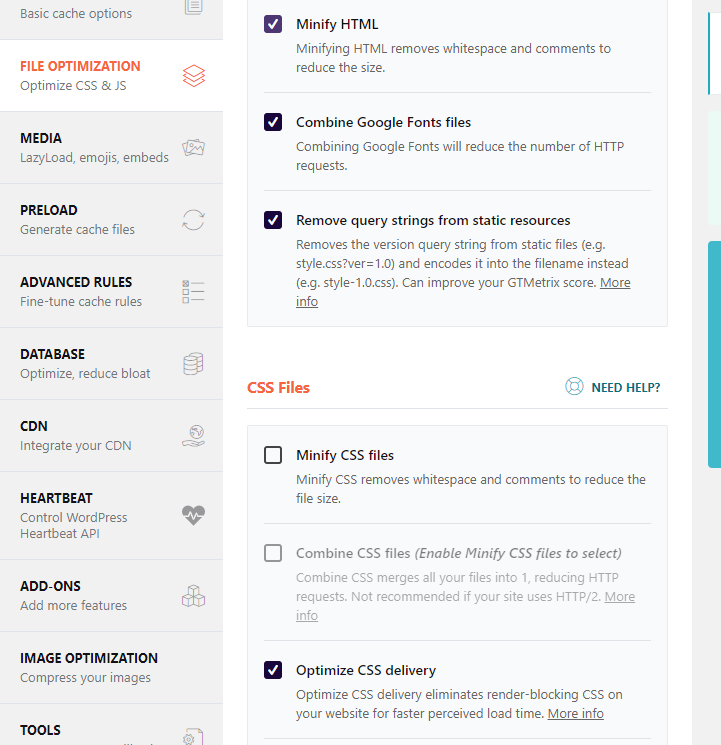
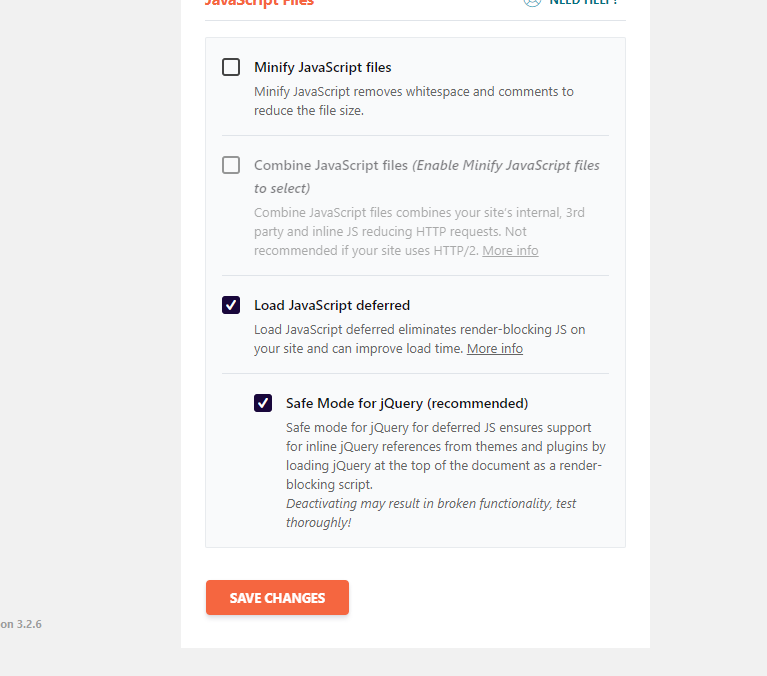
Once active, you can go the the WP Rocket menu in the top of your dashboard and click settings.

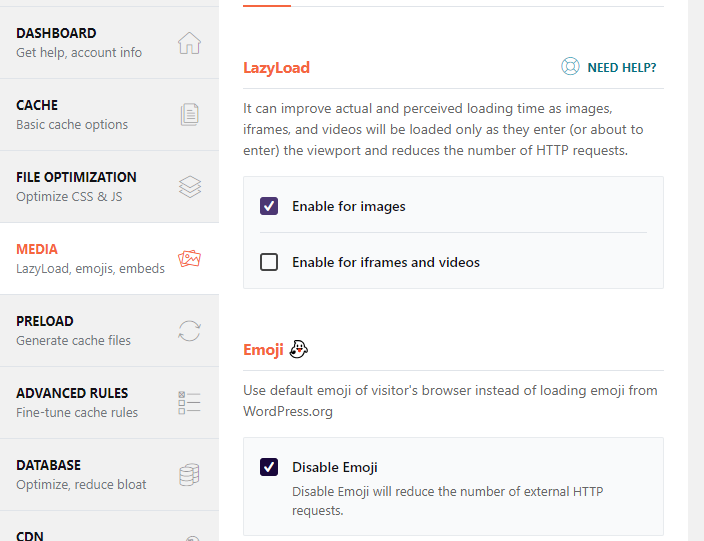
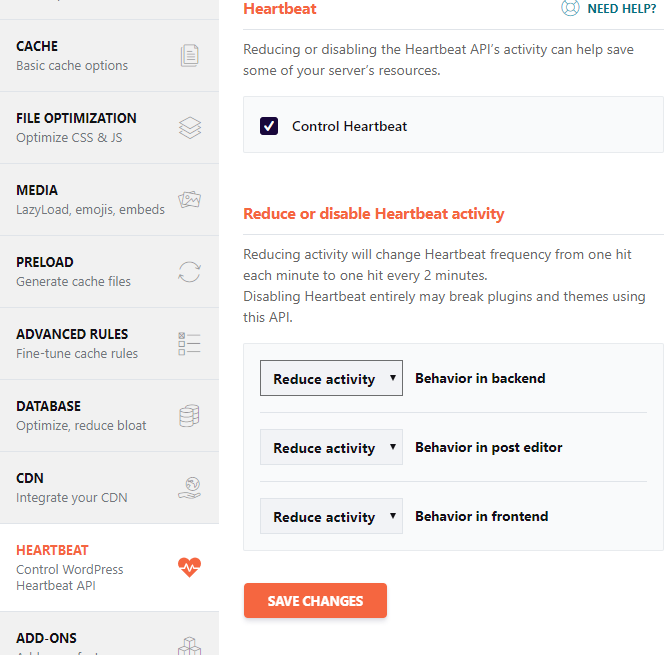
Here are some screenshots of the settings we suggest.
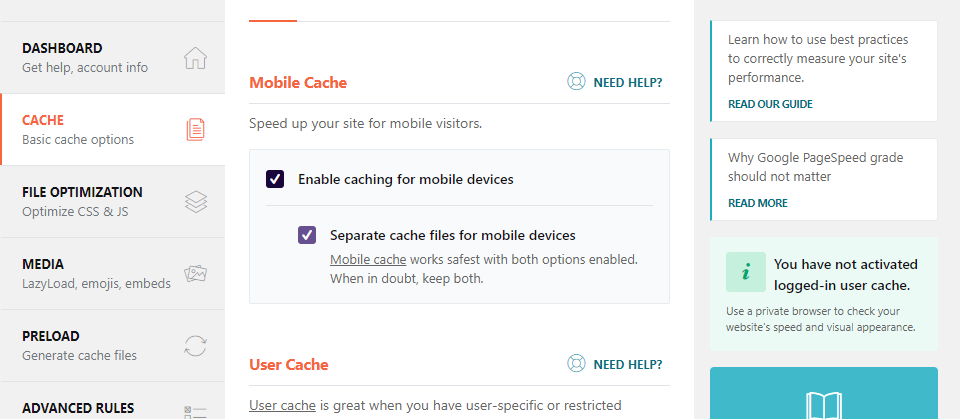
The next setting is about lazy loading images. This can help site speed, but please check your site after you turn this one and save. This feature doesn’t work on all sites well.
Once you are done, you can hit Save Changes and the cache will start working. Please check your site to make sure things are working. Do this in incognito in Chrome or Firefox so you are not logged in.
WP Fastest Cache
Setting up WP Fastest Cache is done by installing it through the plugins page. Search for WP Fastest Cache, then install and activate.
You can go to the settings by clicking on the WP Fastest Cache menu in WordPress after it is activated.
Here are the options we typically setup for customers:
- Cache System – Enable
- Logged-in Users – Don’t show the cached version for logged-in users
- Mobile – Don’t show the cached version for desktop to mobile devices
- New Post – Clear cache files when a post or page is published
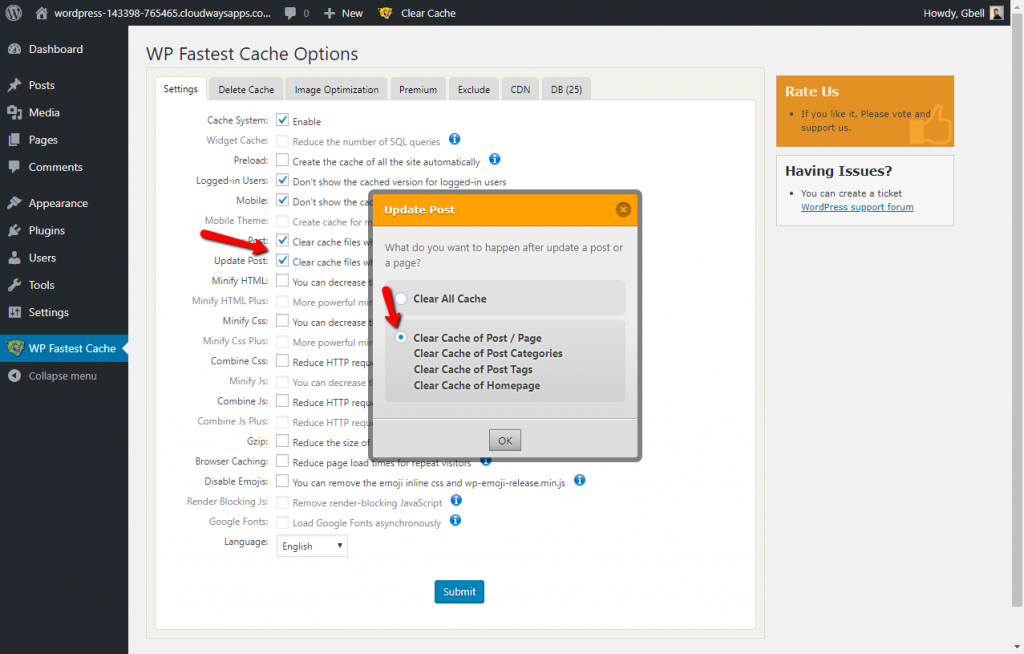
- Update Post – Clear cache files when a post or page is updated
- Minify HTML – You can decrease the size of page
- Minify Css – Please check the live site when this one is checked
- Gzip – Reduce the size of files sent from your server
- Browser Caching – Reduce page load times for repeat visitors
- Disable Emojis – You can remove the emoji inline css and wp-emoji-release.min.js
- Language – English
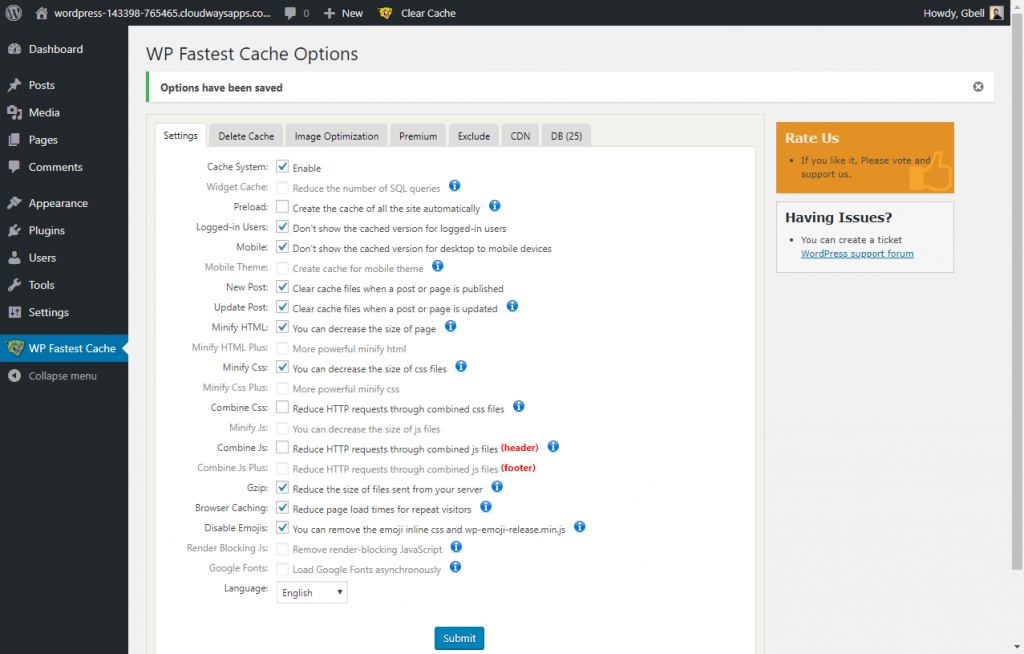

Once done, just click Submit.
I know this is a lot to take in, but these are the plugins we recommend for beginners. Using these will help you get on the right foot with your blog and allow you to focus on creating content.
Thanks so much for this! I updated many settings for WP Super Cache. Was curious why we shoul dnot automatically update Wordfence?
Thanks!
We don’t believe in automatically updating any plugins. Plugin updates don’t always go well and when you allow them to auto-update, you open yourself up to broken sites.