How to Start an Awesome Blog in Just 5 Easy Steps
A few weeks ago, we published a very detailed “How to Start a Blog” guide that went through every step in the process. We really enjoyed it, but got some feedback that it was a little overwhelming for you new WordPress bloggers. For those of you who want to start a blog, but don’t know how, there is too much information in there. Looking back, we were using our knowledge of 11 years in the blogging space to create the guide. Instead, we need to come at this from an overview.
We’re always here to help out new bloggers get started, hence why we created our original guide. We even offer a completely free start up service where will will install and do a basic setup for anyone who needs it. If you want to learn more about that service, go here. For those of you who like to get their hands dirty, but aren’t sure where to start, we are going to give you a quick, 5-step guide to get you moving in the right direction. This is for those who plan on using a self-hosted WordPress blog. If you don’t know what that is, read this. If you’ve chosen WordPress (recommended), then read on to get started.
Before you get to step one, you will need about 15 minutes of your time and $50 to purchase hosting (We recommend SiteGround highly!). Once you have that, then sit down, read through this, and get your blog started!
Step 1 – Register Your Domain
You might have a great name for your blog, but you will need to see if that is available as a domain name. One of the places I like to try out is Namecheap to see if a domain is available. You can also purchase your domain through Namecheap, but I have a gift for you in step 2, so just use it now to find a domain.
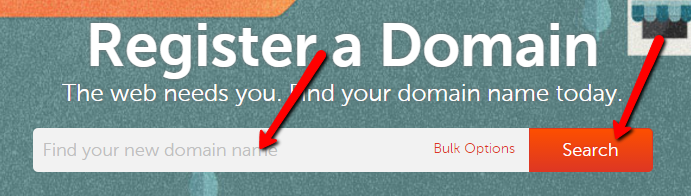
You can type in your domain and see if it’s available. It can take some time to find a domain that you want and is available. I’m partial to .com domains, but you can use anything you want. Why do I like .com domains? The main reason is people still will type it in when they put an address into the browser bar. If you have a .net domain, then it could be missed.
Once you find your domain, head onto step 2, which is hosting for your blog. Just keep the domain name in your mind as the special gift is getting that domain for free! Yes, I’m hooking you up with a free domain.
Step 2 – Purchase Hosting
While there are many hosts out there, we trust and recommend using SiteGround. They have excellent support, fast servers, and we’ve been working with them for years. Many of our monthly maintenance and support clients use SiteGround and have been very happy. While you can choose any host you want, we’re happy with how SiteGround treats our customers and us. For this reason, this guide is going to show you how to start a blog using SiteGround.
You’re more than welcome to choose another host like inMotion, BigScoots, or any other host, but we really do recommend SiteGround and the price is similar to the other services.
Head over to SiteGround and purchase the StartUp plan. You can choose one of the other plans as well, but this is best for just getting started.
For our readers, we were able to negotiate a deal of $3.95 per month and a FREE domain! Yes, that means you can get your hosting plan and a free domain when you choose SiteGround and pay for 12 months of service. Make sure to go to SiteGround through this link or use the button below to get both of these great deals.
Once you choose your plan, go to the next step of entering your domain:
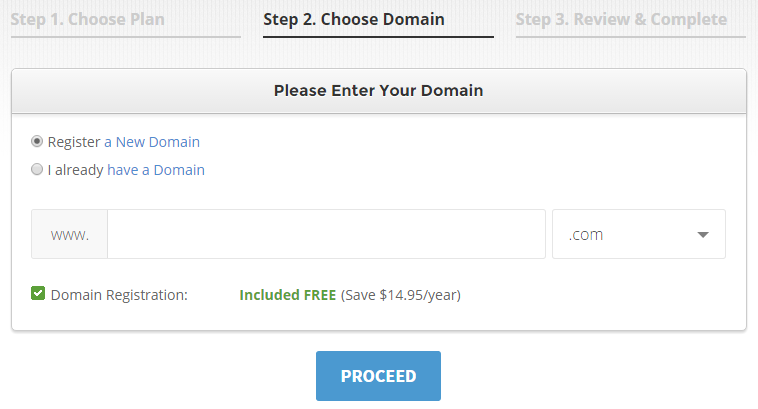
Click the “PROCEED” button and then enter your information:
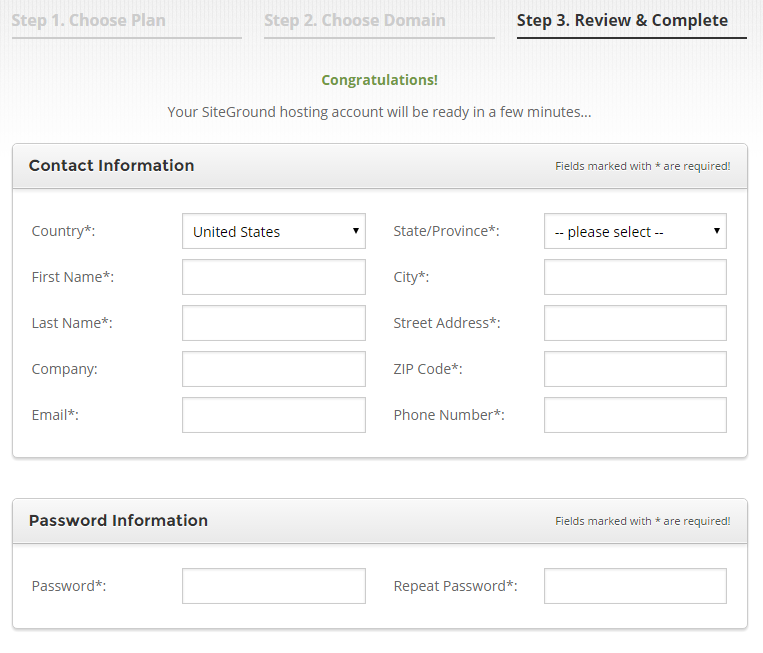
Make sure to verify you have selected the right plan. If you’re in the US, then select the US data center. You can also deselect the HackAlert Monitoring option. You don’t need it.
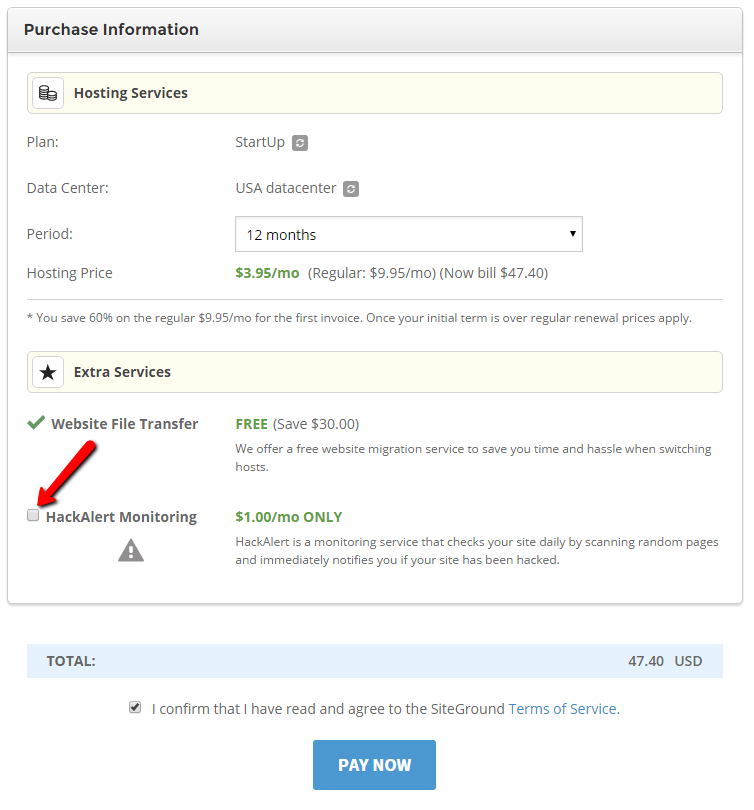
Remember, if you don’t choose at least a 12-month term, you don’t get a free domain, nor do you get to save the most money. You’d only get 60% off for one month and then it will be regular price. For less than $50, you should choose the 12-month plan.
Once you hit “PAY NOW” then you will be done with the hosting step!
Step 3 – Install WordPress
Nice work on getting your hosting. Now comes the fun part, which is installing WordPress. WordPress is known for their famous “5 minute install” process, but you have to know how to create a database and many other things. I’m not going to show you that process. Instead, I’m going to show you the way SiteGround makes it much easier for you!
There are a few parts to this main step, but it’s really easy to handle. There are even graphics for you!
Log into SiteGround
Use the information you got from the SiteGround welcome email to log into your control panel. You will use the password you created at signup. Click here to go to SiteGround.

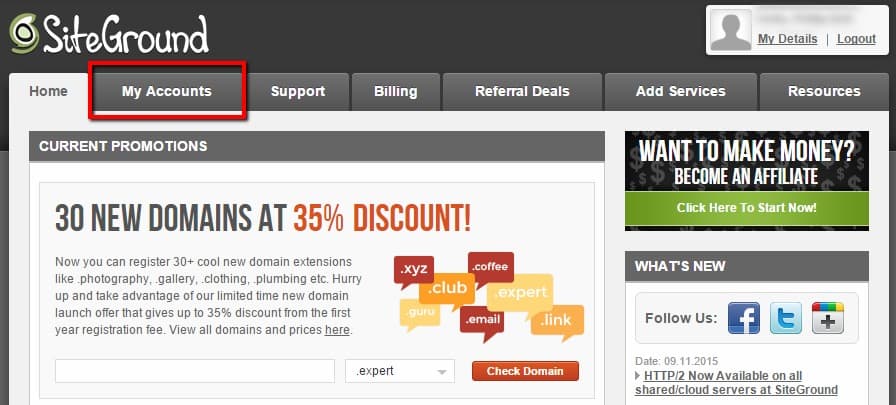
Click on “My Accounts”
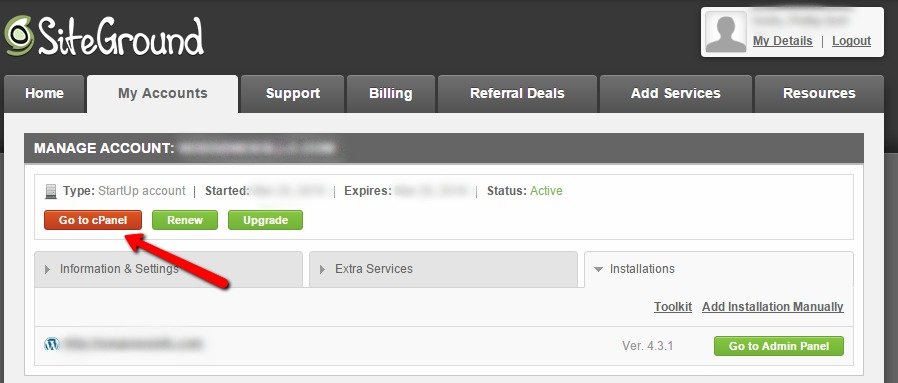
Click on “Go to cPanel” Button
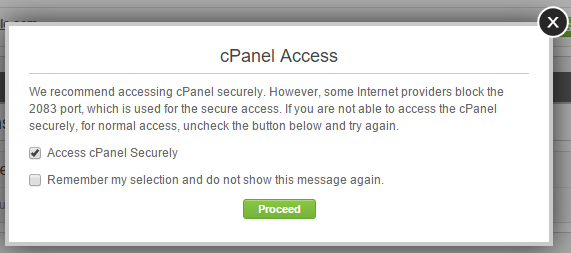
*make sure to click the checkbox in the pop up window to access cPanel securely.
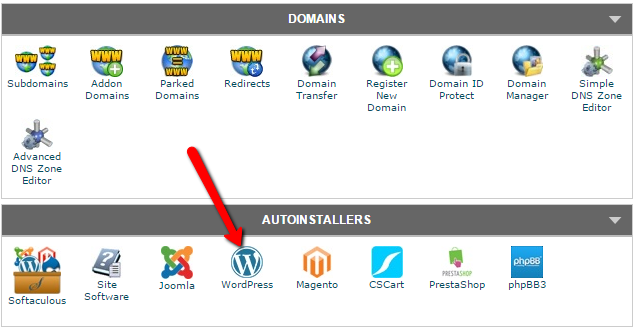
Find “WordPress” Icon and Click to Start Installation
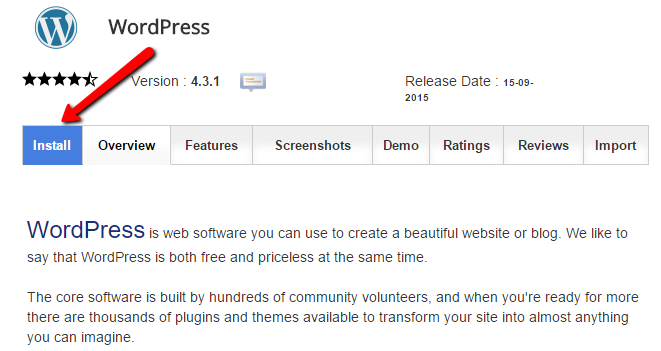
Click “Install”
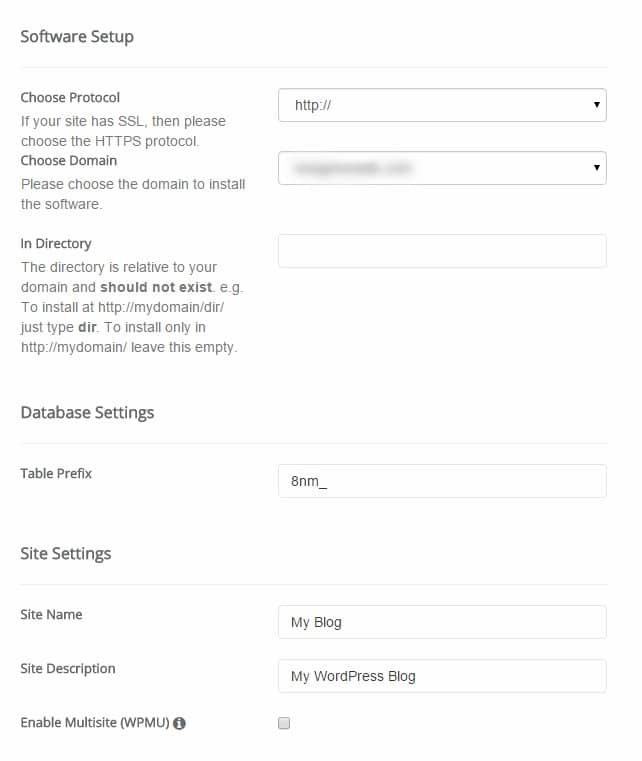
Enter Information
This step needs a bit of information in order to get everything set up. Here is the breakdown of the boxes.
- Choose Protocol – Click the dropdown and choose http:// or http://www. (this is just a personal preference, so choose what you like)
- Choose Domain – If you only have one domain in your account, it will already be selected. If not, use the dropdown to select the appropriate domain.
- In Directory – In most cases you will leave this blank
- Table Prefix – SiteGround typically just creates random letters and number for this. You can create your own but make sure you have a “_” at the end.
- Site Name – What is your site called? Put the title in here.
- Site Description – This is less important, but you can put something easy to remember in here, like a tagline.
- Enable Multisite (WPMU) – Leave this unchecked
- Admin Username – Choose something you will remember, but never choose “admin”
- Admin Password – Choose a hard to guess password. You can use the key icon to generate a random password for you. Just write it down!
- Admin Email – Put the email address you want to receive emails from your blog.
- Select Language – Choose the appropriate language
- Limit Login Attempts – You can keep this checked or disable it. I disable it because there are other plugins that work just fine.
- Clef Secure Passwordless Login – Leave unchecked
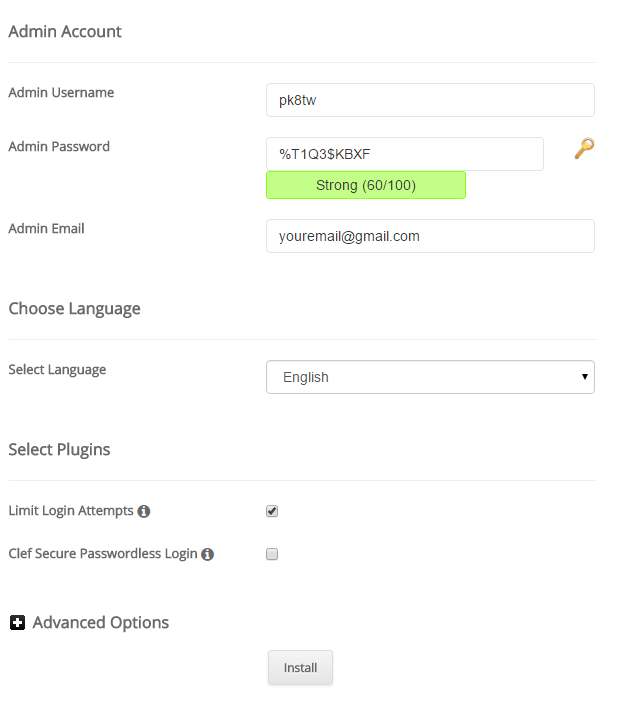
Click “Install” and Enjoy!
Once you click install, it will do its magic and your WordPress blog has been installed.
In order to login to your site, go to http://yourdomain.com/wp-login.php (please put in your actual domain). This will come up with a default WordPress screen for you to enter your username and password that you just created. Remember to write those down! Once you click log in, you will be greeted with WordPress.
Click here to learn more about the WordPress dashboard and interface
Step 4 – Choose a Theme
WordPress functions on themes. There are thousands of them. Since you’re just starting out, I’d recommend you use one of the many great, free themes you find within your WordPress dashboard.
You just need to go to Appearance and then Themes to add a new one.

You can easily search for the most popular free WordPress themes from within your dashboard. You can also see the featured and latest themes as well. This will be the easiest to get started.
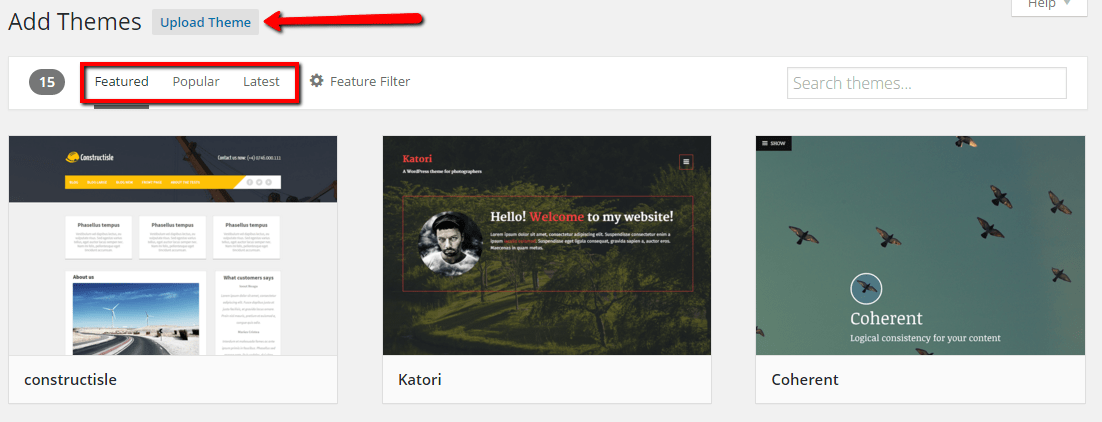
When you find one that you like, you just can click on “install” from within the dashboard and then “activate” to change the look of your site. Adding a theme from within the dashboard is one of the easier ways to change the look and feel of your site.
When you want to customize the look, just go into Appearance > Customize and it will give you options for the theme.
While not including in the $50 start up costs, you can go with a premium theme like those from StudioPress, Elegant Themes, or ThemeForest. There are many to choose from, so that could take some time. When you’re just starting out, you don’t need a premium theme off the bat unless you really like one that has many features you want. Premium themes are typically more supported than free, just as an FYI.
Step 5 – Setup Pages and Write a Post
Once you choose a theme, you need to add some pages. Think about an about page, contact page, and maybe some other page you might want. Remember, this is your blog, so add the pages you want to add. After you add a page or two, you will want to add those pages to your menu. Click here to learn how to do that.
I would start with just a general contact page and about page to hit the ground running. You can use a free plugin called Contact Form 7 in order to create a contact form on your contact page. Super easy!
If you haven’t learned how to add plugins, click here for detailed instructions.
Once you have your page added, you will want to write your first post.
To do that, you just go to Posts > Add New in your WordPress dashboard menu. Writing your first post can be easy or hard, but don’t let it intimidate you. You can write whatever you want! It’s your blog!!
Here is a breakdown on how to use the WordPress post editor. Take some time to read over it.
So, there you have it. In about 15-20 minutes, you can have a new blog to call your own. I’d always recommend going self-hosted WordPress over any other option. Why? It’s one of the most versatile platforms around powering some of the largest sites on the web and giving you the ultimate in flexibility. I’ve been using it for over 11 years and have recommended it to many.
If all of this seems overwhelming, then please take a look at our free WordPress installation and setup service. We can do it all for you, for FREE! There are some steps to follow, but it’s fairly easy.
If you’ve already purchased hosting and you still aren’t comfortable with the steps, then please look for our blog installation and setup service. We can get it done for you quickly and have you up and running with your very own blog.
We also want to make sure you don’t ever have any questions. If you need anything, please contact us and we’ll be happy to help!

I already have a free wordpress blog that has a years worth of posts. I’m using a .wordpress.com though, and I’d like to upgrade to owning my domain. Can I upload my current blog following these steps? I don’t want to lose anything I’ve already written.
You can use these steps to create your WordPress blog on a new host, but there are more steps involved in getting your old content over to self-hosted WordPress. You can export your content, then import it in. You do have to pay WordPress.com for a redirect though if you go this route. If you need help, please let us know.
You can also just purchase your domain and upgrade your WordPress.com account to use that domain. I don’t remember the cost though. You still don’t get as much control as you would going self-hosted, but I will leave that up to you.
That’s a pretty neat guide for the beginners like me. I am still struggling with the monetization part. Probably, it is because I have not achieved the ranking yet. SEO and link building seems to be a more difficult task than anything else
What a thorough post on wordpress. I wish I had seen something like this before I started my blog; this would have been very helpful.
I can tel;l you are knowledgeable about wordpess. thanks