How to Add an Image to Your Sidebar without a Plugin
There are a lot of blogs out there and most of them use images (well, I hope they do). I’m a fan of images, but I’m not a fan of using a ton of plugins to get my site to do something I want. This is why I love just simple HTML coding. Once you learn it, you have a lot more power of your site and what you do with it.
I got a question the other day about adding an image to the sidebar of a blog. Now, in my head, this was an easy answer. I would just code that bad boy in there and be done with it. Unfortunately, not everyone is ready for coding images into sidebars or any other place for that matter. WordPress does make it relatively easy for you to add an image to a post, link it to some place, and align it. Today, I’m going to show you two methods of adding an image to your sidebar without getting a plugin!
How to Code an Image into Your Sidebar
OK, the first way is with general HTML coding. Coding an image is not very difficult, but I’m going to show you the method. Below is the logo of iMark Interactive. You see the logo, but I’m going to show you the code!
![]()
Here’s the code behind this image:
[php]<a href="https://www.imarkinteractive.com"><img src="https://www.imarkinteractive.com/wp-content/uploads/2015/05/new_imark_logo.png" alt="iMark interactive logo" width="250" height="86" /></a>[/php]
OK, let’s just focus on the part that actually shows the image. Here is just the image code below:
[php]<img src="https://www.imarkinteractive.com/wp-content/uploads/2015/05/new_imark_logo.png" alt="iMark interactive logo" width="250" height="86" />[/php]
OK, image code starts out with an open < then telling it this is an image with “img”. Next, you add in the URL of where the image is located. If you uploaded this to your media library, then go to Media and click on the image to get the URL. Then we move to the ALT text. For my example, it’s this:
alt=”iMark Interactive logo”
This is describing to the search engines what this image is referencing. It’s the logo of this site. If it was a picture of a baby eating carrots, you could put in alt=”baby eating carrots” and you would be good.
One part that is not in here is the image title. This isn’t necessary for images, but it does provide a bit of text when someone hovers over the image. To code that in, you can just add this to the code:
title=”iMark Interactive”
Next we move onto the size parameters. It’s always a good practice to put in the width and height of your image. This tells the browser what size the image should be and they can hold that place until the image fully loads. This is also a way to resize the image using the browser. If you upload an image that is large, but you need to resize it, you can change the width and height parameters easily. All in all, including an image title, the code would look like this:
[php]<a href="https://www.imarkinteractive.com"><img src="https://www.imarkinteractive.com/wp-content/uploads/2015/05/new_imark_logo.png" alt="iMark interactive logo" title="iMark Interactive" width="250" height="86" /></a>[/php]
OK, in the first example, we added a link to our image. This allows someone to click the image and go to a different page or even site. All you have to do is wrap the image code with a link code. Here is the basics of a link code:
[php]<a href="https://www.imarkinteractive.com"></a>[/php]
Now, if you wanted some text to be linked to a different page, you would put that text between the >< tags. Here is a quick example.
[php]<a href="https://www.imarkinteractive.com">iMark Interactive</a>[/php]
This will now link to our home page using the text iMark Interactive. It will look just like the link below.
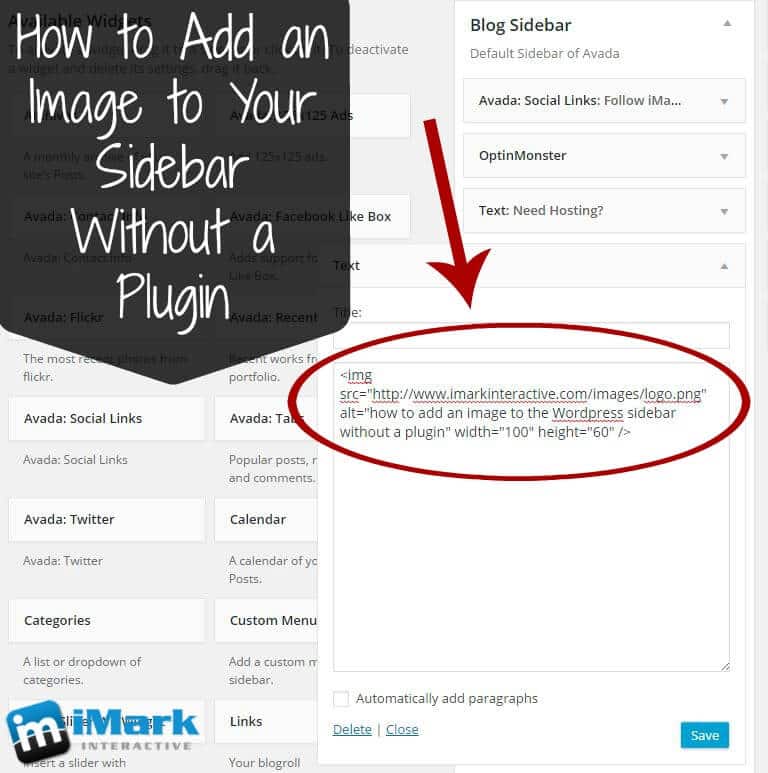
And that’s it! If you want to put an image in your sidebar, then you just drap a Text Widget over into your sidebar and then add the code above and save. That will add your image. For those who aren’t sure what I’m talking about, here is another simple cheat!
Adding an Image to Your Sidebar by Copying the Code
OK, we all know how to add an image inside a post or page. WordPress makes that super simple. You can just click the “Add Media” button and pick an image, then align it and your set.
A simple way to add an image to your sidebar without using a plugin is to edit a post or create a new, test post. Click inside the editor and then add media. You can align the media in the center if the image isn’t large enough to fill your sidebar width, or you can leave it. You can also add in a link Here are a few screenshots.
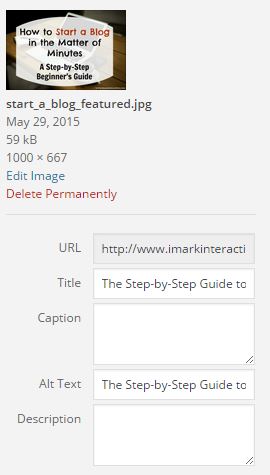
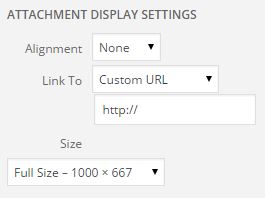
When you’re adding an image, just make sure to fill out the title and Alt text. Then you can change the alignment in the Attachment Display Settings. If you want to link the image to a page, you can put in “Custom URL” and then add the URL. You can also resize the image based on your theme defaults.
Once you’ve added the image to the test post/page, you can click the “Text” tab in the editor box, which is right next to Visual. Here is a screenshot.
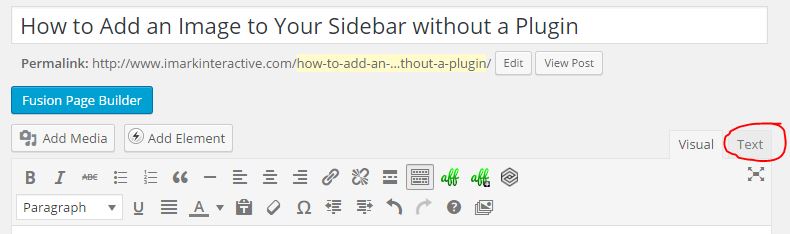
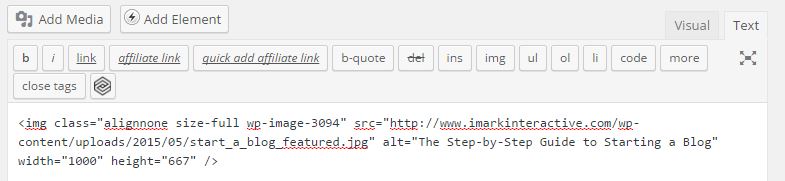
When you do that, you will see the HTML code for the image (as shown above). You can now just copy that code and place it inside of a Text Widget on your sidebar. Just save the widget and you’re good to go. You don’t need to keep the text post/page, so you can just trash it.
OK folks. That’s how you add an image to your sidebar without adding another plugin to your site. This is really easy to do once you get the hang of it. I always go with the first method, but some like using the second. Either way, go get your code on!

