You reached this page because you have installed one of our plugins. We created this page to help you install and setup the plugin on our site. Some plugins are simple to install and set up, while others take more time.
Please choose the plugin you have installed below in order to see how you can set it up.
We work hard to provide accurate information for our plugins. If you find any inconsistencies or have issues, please let us know in the plugin feedback form below. If you have ideas for new plugins, please share in the form below.
Getting Started with iMark Interactive Toolkit
Welcome to the iMark Interactive Toolkit! This plugin provides essential tools for managing your WordPress site, including newsletter signup forms, popup controls, and easy access to additional iMark plugins. To get started, make sure your site has an active monthly support subscription with iMark Interactive.
Accessing the Plugin
After activating the plugin, navigate to your WordPress admin dashboard and look for the “iMark Toolkit” menu in the left sidebar. From here, you’ll find several options:
- Toolkit (Main Page) – Configure core features and settings for your site.
- URL Finder – This tool allows you to search for a specific URL and it will show you where that link is on your site (within pages and posts)
Installing Additional Plugins
The iMark Plugin Manager (found under iMark Toolkit → Plugin Manager) allows you to browse and install additional plugins from the iMark repository. Simply click “Install Now” on any plugin you’d like to add, then click “Activate” once installation is complete. Note that these plugins require an active monthly support subscription and the iMark Toolkit to remain active on your site.
For plugins that include a “View Setup Guide” link, click it to access detailed instructions specific to that plugin.
Need Help?
If you run into any issues or have questions about configuring your site, contact iMark Interactive support through the contact iMark support button or just email contact@imarkinteractive.com. The support team can assist with plugin configuration, troubleshooting, and customization requests.
Configuring Your Default Settings
After activation, navigate to Settings → Engagement Blocks to configure your defaults. Here you can choose which AI services to enable (ChatGPT, Google AI, Perplexity, and Grok), customize button colors, and set default button labels. You can also customize the prompts that are sent to each AI service—the plugin automatically includes your post title and URL, but you can add text before or after to guide the AI’s response.
You can see the available shortcodes under Settings > Engagement Blocks in your WordPress menu.
For the Google Trusted Source button, you can set the default button text, choose between a colored or white Google icon (useful for dark-themed buttons), and pick your button colors. All these settings are applied automatically when you insert new blocks, saving you time.
Adding Blocks to Your Posts
In the WordPress block editor, search for “AI Summary” or “Google Trusted Source” to find the blocks. The AI Summary Buttons block displays a row of buttons for whichever AI services you’ve enabled—when visitors click one, they’re taken to that AI service with a pre-filled prompt about your content. The Google Trusted Source block displays a single button that links to Google’s preferences page, pre-filled with your site’s domain.
Once inserted, you can customize each block individually using the sidebar settings. Change colors, adjust button text, modify alignment, or tweak the AI prompts—any changes you make to a specific block won’t affect your global defaults or other blocks.
Engagement Block Patterns
We are creating new engagement block patterns to help sites succeed with different layouts. These patterns will be created over time and updated as we get more feedback. These can be found when inserting a block, going to browse all, then click on Patterns. You will find the available patterns under the Engagement Blocks category.
Tips for Best Results
Consider placing AI Summary Buttons at the top of longer articles where readers might want a quick summary or have follow-up questions. The Google Trusted Source button works well in the same area as the AI summary buttons or near the top of the post where you’re building trust with your audience. Experiment with button colors that complement your theme, and write prompts that encourage useful AI responses. Don’t just use the default prompts for each post.
Running Your First Scan
- Go to Link Beacon > Link Scanner
- Select which post types to scan (Posts, Pages, or both)
- Click Start Scan
- Wait for the scan to complete – you’ll see progress as it runs
Understanding Results
Each row shows:
- URL: The link found in your content
- Status: HTTP status code (200 = OK, 404 = Not Found, etc.)
- Found On: Which posts/pages contain this link
Status Code Guide:
| Code | Meaning | Action Needed |
|---|---|---|
| 200 | Working | None |
| 301 | Redirect | Consider updating to final URL |
| 404 | Not Found | Fix or remove the link |
| 410 | Gone | Remove the link |
| 500+ | Server Error | Check if site is down |
Fixing Broken Links
- Hover over any row to see Edit and Delete options
- Click Edit to open the post containing that link
- The problematic link will be highlighted in the editor
- Update or remove the link as needed
Orphaned Content Scanner
Orphaned content are posts/pages that have no internal links pointing to them – they’re hard for visitors and search engines to find.
Running the Scanner
- Go to Link Beacon > Orphaned Content
- Select post types to check
- Click Scan for Orphaned Content
Using Link Suggestions
For each orphaned post, Link Beacon suggests related content where you could add a link:
- Suggestions are based on similar titles, shared categories, tags, and SEO keywords
- Click a suggestion to open that post and add a link to your orphaned content
Filters
Status Filters
Check/uncheck status codes to show only certain link types (e.g., show only 404s)
Category Exclusion Filters
Hide results from specific categories:
- Click the Category Filters dropdown
- Check categories you want to EXCLUDE
- Results from those categories will be hidden
- The count updates to show how many are hidden
Recommended Settings
For Regular Maintenance
- Scan frequency: Run a full scan weekly or after publishing several posts
- Post types: Include all public post types (Posts, Pages, and any custom types)
- Focus on: 404 and 410 errors first – these hurt SEO and user experience
For Large Sites (1000+ posts)
- Scan during low-traffic hours
- Use status filters to focus on problem links only
- Work through broken links in batches
Best Practices
- Fix 404s promptly – Broken links hurt SEO and frustrate visitors
- Check redirects (301s) – Update to final URLs for faster page loads
- Address orphaned content – Either add internal links or consider if the content is still needed
- Re-scan after fixes – Verify your changes worked
Tips
- Rescan individual posts: When editing a post, use the Link Beacon meta box to rescan just that post
- Export results: Download your link data as CSV for reporting or further analysis
- Column visibility: Click column headers to show/hide columns and customize your view
- Sorting: Click any column header to sort results
Troubleshooting
Scan seems stuck?
- Large sites take longer – watch the progress indicator
- Try scanning fewer post types at once
Category filter not working?
- Make sure you’ve run a fresh scan after updating the plugin
- Category data is collected during the scan
Links showing wrong status?
- Some sites block automated requests – the actual link may work fine
- Click the URL to verify manually
Getting Started with Image Auditor
Image Auditor helps you manage all the images on your WordPress site from one central location. It shows you where each image is used, helps you update alt text for better SEO and accessibility, and identifies images that might be slowing down your site or are no longer needed.
Important – playing with images and removing unused images is a breaking change. You should always make sure you have a backup before doing any changes. You can run the reports, but before you make edits, have a backup.
Your First Scan
After installing the plugin, head to Image Auditor → Dashboard and click the “Scan Site” button. The plugin will search through your entire website—posts, pages, custom post types, widgets, theme settings, and custom fields—to find every place an image appears. This initial scan may take a few minutes on larger sites, but you’ll see a progress bar so you know it’s working.
Once the scan completes, you’ll see a list of all your images with helpful information: a thumbnail preview, the filename, whether the image has alt text, and how many times it’s used across your site.
Managing Alt Text
Alt text is essential for accessibility (helping screen readers describe images to visually impaired users) and SEO (helping search engines understand your images). With Image Auditor, you can edit alt text directly from the dashboard. Simply type your new alt text in the field next to any image then click save to get that into the image. Then click “Sync” to update it everywhere that image appears on your site. It will ask you if you want to skip existing alt text (often the best option) or override, which allows you to force update the alt text on the image on all posts no matter if it already has it in the post editor.
If you have many images to update, select multiple images using the checkboxes, then click “Sync Selected” to update them all at once. The plugin processes these in batches to prevent your server from timing out.
Finding and Removing Unused Images
Over time, websites accumulate images that are no longer used anywhere. Use the “Unused” filter to see images that aren’t appearing in any posts, pages, or other content. Review these carefully—some may be intentionally unused (like logo variations)—then select the ones you want to remove and click “Trash Selected”.
Trashed images aren’t deleted immediately. Switch to the “Trash” filter to review them one more time. When you’re confident, click “Empty Trash” to permanently delete them and free up storage space.
Checking for Broken Images
If you’ve deleted images in the past, you might have broken image links in your content. Visit Image Auditor → Broken Images and run a scan. The plugin will find any references to images that no longer exist, showing you exactly which posts or pages are affected so you can fix them.
Optimizing Large Images
Large image files slow down your website. Visit Image Auditor → Large Images to find images over 250KB. You can sort the results by file size (to tackle the biggest offenders first) or by usage count (to prioritize images that appear on many pages). Once identified, you can compress or resize these images using your preferred image optimization tool or plugin.
Tips for Best Results
- Back up your site before making bulk changes like syncing alt text or deleting images. You can ask iMark support to run a backup for you before working on the images.
- Run a fresh scan after making significant changes to your site content
- Check broken images after cleaning up unused images to ensure nothing was accidentally affected
- Re-scan periodically as you add new content to keep your image data current
What is RUM Tracker?
RUM Tracker monitors your website’s performance as real visitors experience it. Unlike synthetic tests that simulate page loads, RUM (Real User Monitoring) captures actual data from your visitors’ browsers—giving you the true picture of how fast your site loads across different devices, locations, and network conditions. The plugin specifically tracks Google’s Core Web Vitals: the metrics that directly impact your search rankings and user experience.
Understanding Core Web Vitals
The plugin tracks five key metrics. LCP (Largest Contentful Paint) measures how quickly your main content becomes visible—aim for under 2.5 seconds. CLS (Cumulative Layout Shift) detects when page elements move unexpectedly while loading, which frustrates users trying to click buttons or read text—keep this below 0.1. INP (Interaction to Next Paint) tracks how responsive your site feels when visitors click or tap—target under 200 milliseconds. FID (First Input Delay) measures the delay before your page responds to the first interaction. TTFB (Time to First Byte) shows how quickly your server responds to requests.
Using the Dashboard
After installation, visit the RUM Tracker dashboard in your WordPress admin to see your data. The overview shows your current Core Web Vitals scores with color-coded indicators: green means you’re passing, orange suggests room for improvement, and red indicates issues that need attention. Use the date range filters to spot trends over time, and click on any page path to see detailed performance data for that specific URL. The Events tab shows individual visitor sessions, which is helpful for diagnosing problems on specific pages.
Debugging Layout Shifts with Screenshots
One of RUM Tracker’s most powerful features is visual CLS debugging. When enabled in Settings, the plugin automatically captures screenshots of elements that cause layout shifts. These screenshots highlight the problematic element with a red outline, making it easy to identify exactly what’s moving on your page. Screenshots are blurred by default to protect visitor privacy—simply hover over them to see the full image. This visual evidence helps you quickly pinpoint and fix the CSS or loading issues causing layout instability.
Configuring Your Settings
Navigate to RUM Tracker → Settings in your WordPress admin to customize how the plugin collects and stores data.
Sampling Rate controls what percentage of visitors are tracked. For high-traffic sites, setting this to 10-25% provides statistically valid data while reducing database storage. Smaller sites should keep it at 100% to capture every session.
Data Retention determines how long event data is stored before automatic cleanup. The default of 30 days balances useful historical data with database efficiency, but you can extend this to 90 days if you need longer trend analysis.
CLS Screenshots is where you enable the visual debugging feature. When turned on, the plugin captures images of elements causing layout shifts above the threshold (0.05 by default). Keep in mind that screenshots require additional storage space—the plugin enforces a quota to prevent runaway disk usage. You can also choose whether to capture screenshots for logged-in users, which is useful during development but typically disabled in production for privacy.
Exclude Paths lets you skip tracking on specific URLs. Add paths like /wp-admin/, /cart/, or /checkout/ if you don’t need performance data from those pages. This reduces noise in your reports and saves database space.
After changing any settings, click Save Changes. New settings take effect immediately for subsequent page loads—existing stored data isn’t affected.
Setting a Custom H1 Title
After activation, navigate to Posts > Categories in your WordPress admin. You can either edit an existing category or create a new one. On the category edit screen, you’ll see a new field labeled “Custom H1 Title” below the standard category fields. Simply enter the heading text you want to appear on that category’s archive page. For example, if your category is called “Tech News” but you want the page heading to read “Latest Technology News and Updates,” enter that in the Custom H1 Title field. Click Update (or Add New Category if creating a new one) to save your changes.
Viewing Your Changes
Visit your category archive page on the front end of your site to see your custom heading in action. The custom title will replace the default category name in the main H1 heading area, including the Kadence theme’s hero header section if you’re using that layout option. If you leave the Custom H1 Title field empty, the category will simply display its normal name as before.
What This Plugin Does
The iMark Primary Category Editor adds a convenient way to view and edit the primary category of your posts directly from the WordPress “All Posts” screen. Instead of opening each post individually to change its primary category, you can now do it with just a few clicks using Quick Edit.
This plugin currently only supports Yoast SEO plugin.
Getting Started
After installing and activating the plugin, navigate to Posts > All Posts in your WordPress dashboard. You’ll notice a new column called “Primary Category” has been added to your posts list. This column displays the currently assigned primary category for each post, or “No primary category set” if one hasn’t been assigned yet.
Editing a Post’s Primary Category
To change a post’s primary category, hover over the post you want to edit and click the “Quick Edit” link that appears. In the Quick Edit panel, you’ll see a new dropdown menu labeled “Primary Category” where you can select from any of your existing categories. Simply choose the category you want to set as primary and click “Update” to save your changes. The Primary Category column will immediately reflect your selection.
Important Tips
When selecting a primary category, make sure to choose a category that is already assigned to the post. The primary category feature works best when the selected category is one of the post’s existing categories. If you need to add a new category to a post, you’ll want to do that first and save the quick edit, then use Quick Edit again to set it as primary.
There’s also a helpful checkbox labeled “Don’t update modified date” in the Quick Edit panel. Check this box if you want to change the primary category without updating the post’s last modified date – useful when you’re organizing posts but don’t want to affect their timestamps.
Getting Started with Auto Blocks
Auto Blocks is a powerful WordPress plugin that lets you create reusable content blocks and automatically insert them into your posts. Whether you want to add affiliate disclosures, calls-to-action, newsletter signup forms, or any other recurring content, Auto Blocks saves you time by handling the insertion automatically based on rules you define.
Creating Your First Block
To create a block, navigate to “Auto Blocks” in your WordPress admin menu and click “Add New.” Use the familiar WordPress block editor to design your content—you can include text, images, buttons, or any other blocks you normally use. Give your block a descriptive name (like “Newsletter Signup” or “Affiliate Disclosure”) so you can easily identify it later.
Choosing Where Your Block Appears
The real power of Auto Blocks is in its insertion options. In the “Auto Insert Location” dropdown, you can choose exactly where your block appears: at the beginning or end of posts, before or after specific HTML elements like paragraphs or headings, or even in the middle of your content. If you use recipe plugins like WP Recipe Maker, Create, or Tasty Recipes, you can also insert blocks before or after recipe cards.
Targeting Specific Categories
Not every block belongs on every post. Use the category selector to limit where your block appears—perfect for showing cooking-related promotions only on recipe posts, or displaying book affiliate links only in your book review category. You can also exclude specific posts if needed.
Using Shortcodes for Manual Placement
Sometimes you want complete control over where a block appears. Every block you create comes with a shortcode that you can copy and paste directly into any post or page. Simply click the copy button next to your block’s shortcode and paste it wherever you’d like the content to appear.
Getting Started with WP Click Radar
WP Click Radar begins tracking link clicks automatically as soon as you activate it — no configuration needed. Every time a visitor clicks any link on your site, whether it’s an internal page link or an external link to another website, the plugin records it. To view your data, head to the “Click Radar” menu in your WordPress admin sidebar. The Dashboard gives you an at-a-glance overview with stat cards showing total clicks, internal vs. external clicks, unique visitors, tracked links, and how many bot clicks have been filtered out. Below the stats, you’ll find a trends chart (which you can toggle between all, internal, or external clicks), your top clicked links, top source pages, and device/browser breakdowns. Use the date filter pills at the top — Previous Day, 7d, 14d, 30d, 90d, All, or a custom date range — to narrow down the time period you’re interested in.
Exploring and Managing Your Data
For a deeper dive, visit the “All Links” page where you can search, sort, and filter every tracked link. Click any row to expand it and see which pages on your site generated those clicks. You can export everything to CSV for use in spreadsheets or reports. Under “Settings,” you’ll find options to control data retention (automatically delete old records after 30, 90, 180, or 365 days), toggle bot filtering on or off, and set up excluded URL patterns. The exclusion feature is handy if you want to ignore clicks on certain URLs — for example, print pages or AMP versions of your content. Just enter one pattern per line, and any click whose URL or source page contains that pattern will be skipped from tracking and hidden from your reports. The plugin stores all data in your own WordPress database and never sends anything to third parties, so your visitors’ data stays entirely under your control.
The noindex report plugin is a simple to use report that allows you at any time to scan your site for posts, pages, and categories to see what have been set to noindex in your SEO plugin.
The plugin supports noindex data from Yoast, RankMath, and All in One SEO.
To install the plugin, download it from your iMark order email or from the customer dashboard. It will download as a zip folder.
Go to your dashboard, then Plugins > Add New Plugin. Click the “Upload Plugin” button and choose the zip folder you just downloaded from your computer. Click “Install Now” and then activate.
Once activated, under Settings, there will be a “iMark – Noindex Post Exporter” option. Go there and insert the license you received in your order email. Click activate license.
Once activated, there will be a “Noindex Report” menu item. Click that to access the report.
Click on “Refresh Report” at any time to run the report and the information will be broken out into posts, pages, and categories.
The report includes the Title, Published Date, and links to view the URL and edit.
You can run the report at any time you want this information.
The attachment search filter plugin is a helper plugin that removes a feature WordPress included in the 6.7 release.
After the purchase, you can download the plugin from your emailed order details or go into the customer dashboard and download it from there.
The plugin should download as a zip folder. Leave it zipped.
Go into your WordPress dashboard, then go to Plugins > Add New Plugin, then click the “Upload Plugin” button at the top. Pick the zip folder you just downloaded and hit “Install Now”. Now hit “Activate Plugin”
Once activated, in the WordPress left sidebar menu, there will be a new menu item called “Editor Search Filter License”. Click into this and input your license key. The license key is in the order email you received or in your customer dashboard.
Input the license key and hit “Activate License”
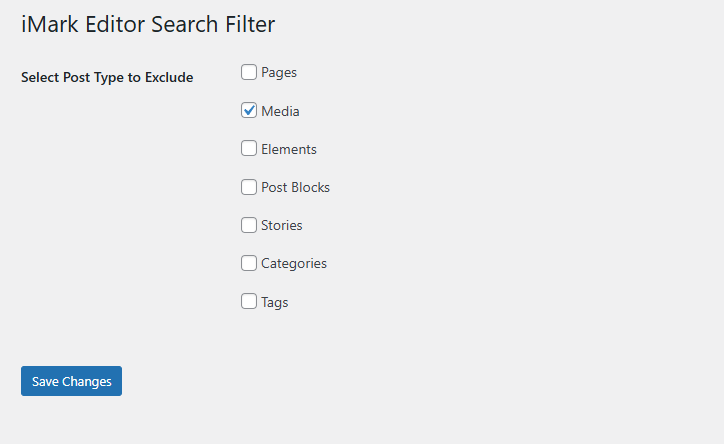
Now you will have a new Menu called “Editor Search Filter”.
You will have a new page with options of what you want to exclude from the internal search for links. These include media (attachments) by default and then pages, categories, and other custom post types found on your site.
Got Plugin Feedback?
Please use the form below to send us information about our plugins. This can be a plugin issue, general feedback, or new plugin ideas you think will benefit the iMark Interactive monthly customers.
